This is the solution that I have come up with. I have never seen the real bumper so this may not be the best way to do it but I am happy with the out come. I started by buying the supplies from two stores. The first item you need is 2 - 1 1/2" freeze plugs from and auto parts store for the large center rubber part. The other items were purchased from a hardware store. 12 - 1 1/2" flat washers 2 - 3/8 x 2"carriage bolts and 2 - 3/8" nuts.
 |
| Items Purchased |
Start by sanding off the ugly letters on top of the bolts. I put the bolt into my drill press and used sand paper starting with a 80 grit sanding disc, you can curve the disc to give you the perfect arc, then work your way down to 400 grit.( 80 - 100 - 220 - 400) Using the sanding disc as a backer to keep the same arc. I ended with a scotch pad to give it the nice brushed look.
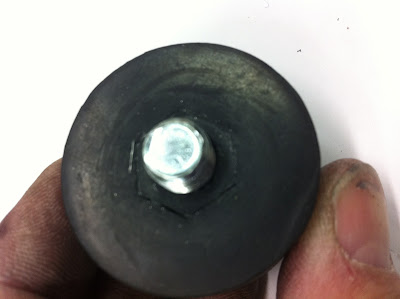
Next twist the bolt into the rubber bushing.
Hand tighten then the nut
Now carefully cut around the nut deep into the bushing. Cutting a little at a time as you work around the nut several times until the handle of the exacto knife touches the top of the bolt.
Remove the nut and bolt.
Finish cutting around the bolt pattern connecting all six sides.
Now cut on an angle around the inside of the hole as shown. Cutting a little at a time. Going slow so you do not cut too deep.
Now pull the center out with a pair of pilers.
You will have to do some minor clean up to get it nice and clean.
Next twist the nut onto the bolt and push it into the buffer.
Before this step you need to install the bumper and measure the distance the bolt comes out of the nut. Measure it with a pair of calipers so you know exactly how long to cut the bolt so it is flush with the nut when it is completely installed.
I ground the bolt to get a nice clean edge.
Next I used a wire wheel brush in the drill press to really clean up the end of the threads so it will easily screw onto the nut.
Cleaned up bolt end.
The assembled unit.
Viewed from the other end.
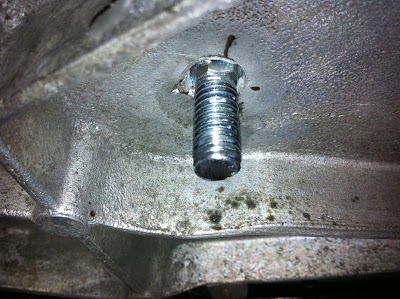
Start the final assembly by making sure the carriage bolt sits flush with the top of the floor board. If it does not go back and grind it down with a dremel until it does.
Sitting nice and flush.
Now take the six washers and twist it all together. Use locktite.
Twisting it until it is nice and tight. Only use your hand to do this you do not want the nut to pull through the buffer
See the bolt is flush with the nut. But is inset so the center stand does not hit the nut.
Center stand centers right on the buffer.
Finished.


No comments:
Post a Comment